Wednesday, November 28, 2012

Woolly Wednesday


Star Wars and knitting go hand in hand in our household!

(Sorry I have no idea where this image originally came from... please let me know if you do!)

Wednesday, November 14, 2012

Saturday, November 10, 2012

My first tutorial. Your first bag...


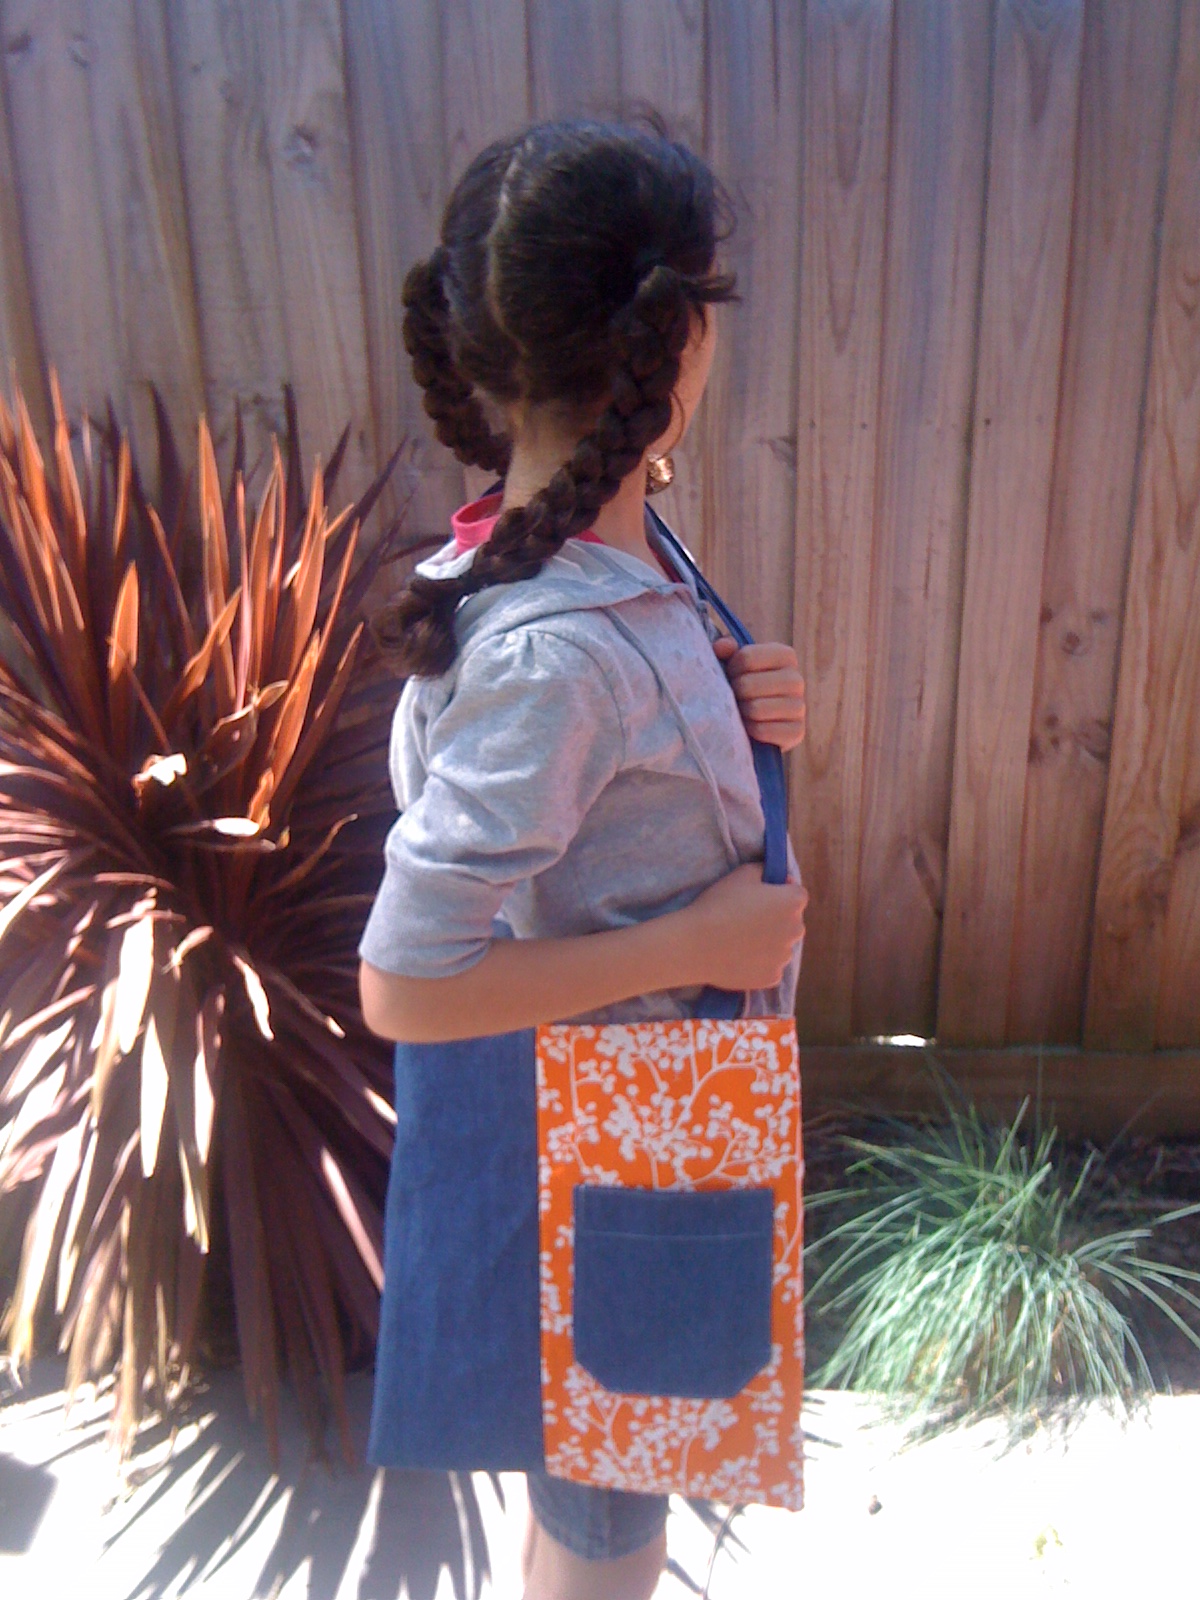
Well, I've decided it's finally time to bite the bullet and post a tutorial! So, I'm starting simple! Feel free to offer constructive feedback for next time! I'm starting with a very simple bag I designed for some young girls that came to my house and wanted to learn to sew! This is a great beginners project but of course anyone can make it! It's a very handy bag and my daughter (10) uses hers all the time! Enjoy...!

Materials:
* 40cm x 115cm drill or similar heavy-weight material ( this is your main colour for outside and inside of your bag) (corduroy, velvet, upholstery fabric etc)
* 50cm x 115cm denim or similar heavy-weight material in contrast colour (this is your outside, pockets and handle colour) or 1metre fabric if you don't want a join in your handles
* thread to match


Cut 3 pieces of your main fabric 13" across and 15" high
Cut 1 piece of your denim 13" across and 15" high

 
Overlock one side of front to contrast and set aside


Cut 2 denim pocket patches 5" across and 7 1/2" high

 Overlock or zig-zag edges of pockets


Turn top of pocket over approx 1" and sew down sides approx 1/4" in (just on inside of overlocked edge)


Turn top right side and press, fold up corners into triangles, press seams using overlocked edge as a guide


Sew top of pocket to seal in edges, pin pocket to front of bag, approximately 1" in from sewn join, sew down close to side and bottom edges


Make 2nd pocket as above (omitting corners if desired) and sew to middle (or as desired) or one inner bag piece


Sew 2nd side of front pieces together to make a tube, then turn until pocket is approximately centred on front and sew bottom seam as shown


Place both inside pieces right sides facing and overlock down side, along bottom, up second side, turn pieces right side out and check you're satisfied. Have a little break if you need one!


Cut 2 straps 4" x 36" (or join two pieces together to make roughly that size, preferably using a diagonal join)


 Fold your straps lengthwise and press, fold both sides in to the middle.
Top stitch both sides close to edges to seal


Attach your handles to outside of bag approximately 2" in from sides, making sure you don't twist them. 
Sew them down approx 3/4" from edge


 Turn inside of bag inside out, place outside of bag into it lining up side seams and raw top edge. Make sure the side of the lining with the pocket is on the opposite side to the pocket on the front of the bag.
Pin in place to hold together ensuring handles are not caught in, and leaving gap for turning (I left a gap between the handles)


Sew around top edge approx 1" from top, leaving gap for turning


Pull bag through opening (grab the handles!)


When your bag is fully turned you can then push the inside back into the outside the right way!
Press top edge ensuring the inside lining does not show on the front, taking special care at the opening.


Top stitch edge of bag close to edge, ensuring you seal both sides of the turning opening together.
Stitch a second row of stitching another 1/4" down.

Press your bag!


Front!


 Back!

Enjoy!

Thanks for visiting! This is a very simple bag so I'm happy for you to link it on your blog, or make to sell, as long as you reference me as the designer! I'd love to see any you make so please post in my flickr group which you can find at http://www.flickr.com/groups/thecraftycamel/ Hopefully this will be the first of many tutorials... come again! 


Wednesday, September 5, 2012

Woolly Wednesday


Just finished this scarf! Could it be a record!? Dead easy free zig zag pattern... cast on 36 then purl 4, knit 4 and gradually move across a stitch at a time each row!

Monday, September 3, 2012

Pocahontas eat your heart out!

This is just to make you laugh a little! The beauty of sewing is that occasionally you get a commission that just makes you chuckle! A friend's boyfriend decided he'd like to attend a fancy dress party as Pocahontas!!! Being dark and all it was really rather amusing! So, after a little searching on the internet for suitable ideas I found this brilliant tutorial  http://blogilates.com/fashion-2/9876043253 A couple of large, cheap t-shirts later... and a bit of snip snip... I got it done! My husband was none too pleased about having to model but alas I was forbidden from taking photos of him!

 I had to alter the pattern slightly because he wanted a one shoulder costume (men! wouldn't you know he'd make it harder!!!) I joined the two collars together and sewed them to the diagonal! Phew! That worked!
He never wore the feathers and arm/head bands and I'm sure he was rather cold on the night being winter and all! But he turned out a pretty convincing Pocahontas... you'd never know he's bald under that glossy hair!!! I'm sure I'll never make another costume like it but it was fun to do!!!

Thursday, August 9, 2012

Woolly Wednesday!


Oh, I do love a bit of Noro Kureyon in Chevron! Dead easy and so addictive!!!

Tuesday, August 7, 2012

Flourish

So, I've just come back from the most amazing Women's Conference in Sydney! "Flourish" is the national conference run bi-annually by the Women's Ministries in the Presbyterian Church of Australia committee (WMPCA for short!), of which I am a member! We've been madly preparing for this for the past year and this year's conference was even more exciting than our first... we made it two days packed with workshops, speakers, fabulous food, and heaps of networking opportunities! Some of the highlights for me were getting away and meeting new people, many of whom are doing amazing things in their communities; fabulous singing; some fascinating interviews with women who were prepared to share their lives with us; leading a workshop on hospitality with a bunch of enthusiastic people; sharing a hotel room with a great girl from Tassie who's set up a great online network for Hobart mums'; hearing some inspiring guys talk about encouraging women to live to their God given potential; having some of my favourite people come up to the conference this time and lead workshops; and so much more! Loved every minute of it! Even added a bit of colour of my own!!! I feel like the real me has finally reached the outside!!!


I also had a great catch up with a good friend of mine... and made Ninjago costumes for her boys while I was there! Fantastic to catch up with someone who is so real about her life, such a good listener, and a top girl even if she can't sew! Fabulous dinner Saturday night, great coffee, and a nice drop of dessert wine! It's always good to see her and her family when I make a trip up to Sydney! Also really enjoyed visiting my old church and catching up with so many familiar faces! Can't wait for my next holiday up at Gosford!!